


Tools Needed:
1. Hex Key 2.5mm
2. Hex Key 3.mm
3. Filip Screw Drive
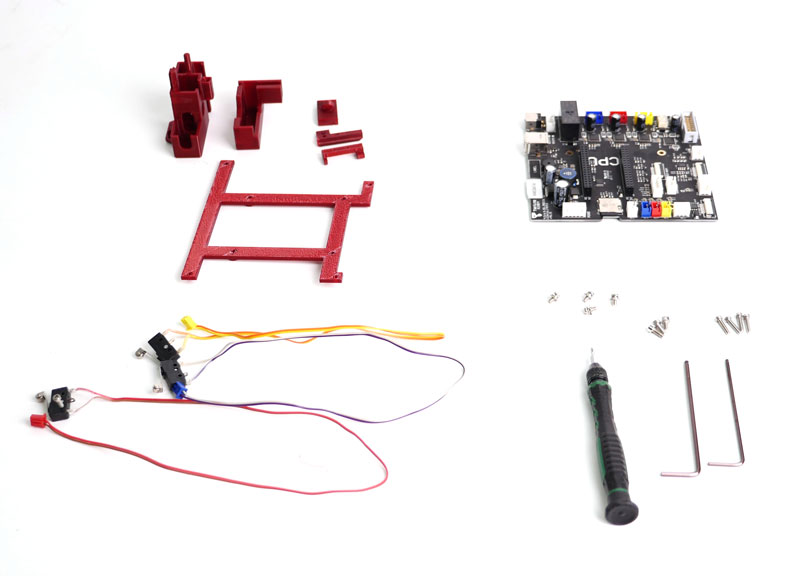
| Cetus MK2 to MK3 Part List BC0881 | ||||
| item | SKU | Name | Spec | QTY |
| 1 | 25007 | T-nuts | M3×10mm | 2 |
| 2 | 25119 | Cable tide | 64mm,adjustable strap | 1 |
| 3 | BC0751 | MK3 Mainboard | 1 | |
| 4 | 04151 | flat head self-drilling philip screw | ST2.5*8 | 6 |
| 5 | 04158 | sunk head philip screw | M3×5 | 10 |
| 6 | 041107 | sunk head philip screw | M2.5*12 | 8 |
| 7 | 04157 | sunk head philip screw | M3*8 | 8 |
| 8 | 40060 | Hex screw | M3×12 | 2 |
| 9 | 25547 | X limit switch with cable | cable:400mm,2P blue connector | 1 |
| 10 | 25548 | Y limit switch with cable | cable:300mm,2P red connector | 1 |
| 11 | 25549 | Z limit switch with cable | cable:250mm,2P yellow connector | 1 |
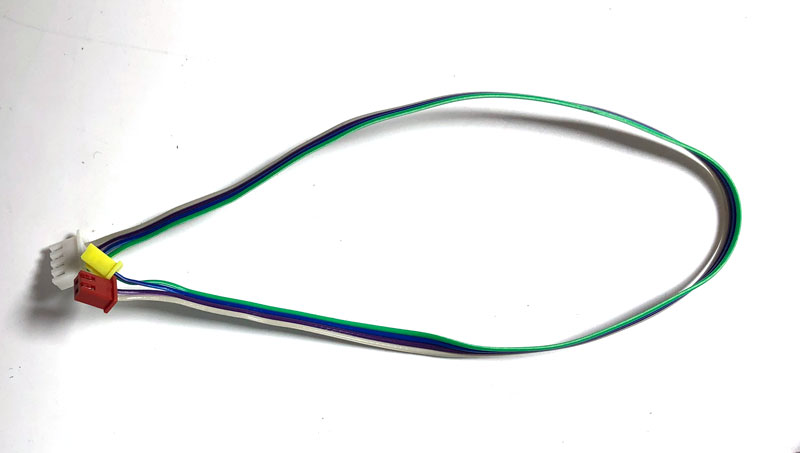
| 12 | 25550 | YZ limit swithc relay cable | cable:330mm | 1 |
| 13 | 25554 | mainboard ground wire | 5pin×80mm | 1 |
| 14 | BC0872 | Extension PCB kit | 1 | |
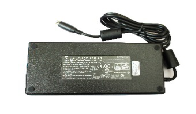
Other Required Components :
After upgrade, if user install the heated build platform, original power supply cannot be used to supply power to the machine. User have to use the 220W Power Supply (sku:XS028).
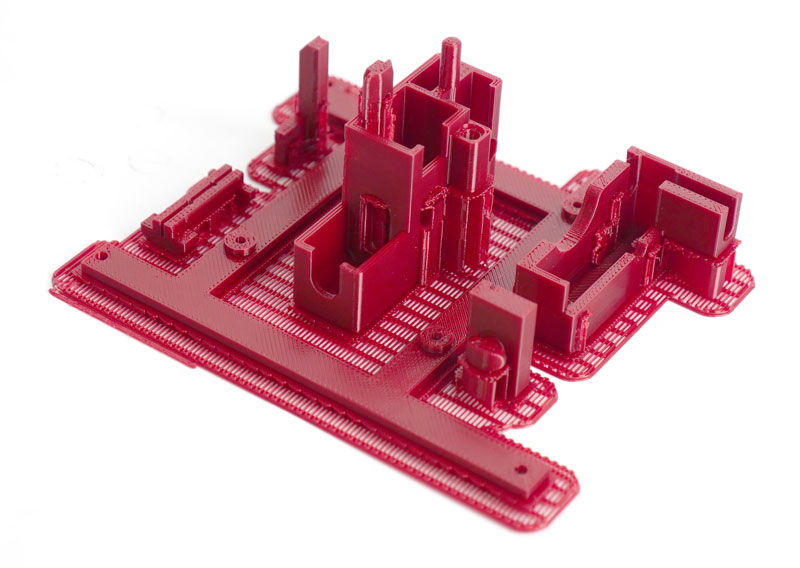
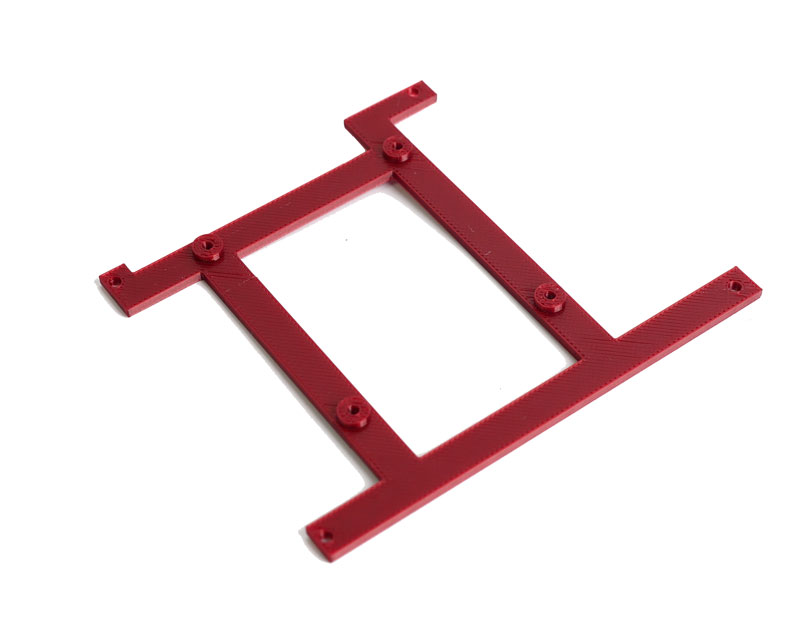
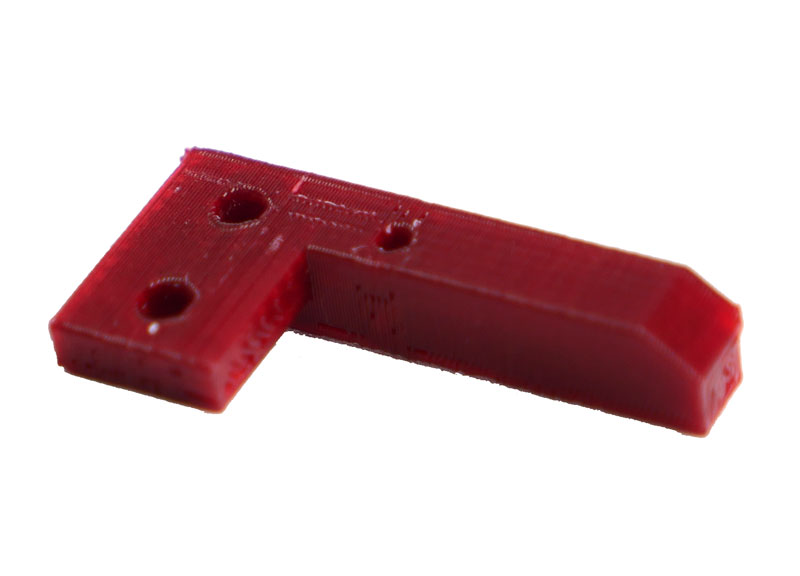
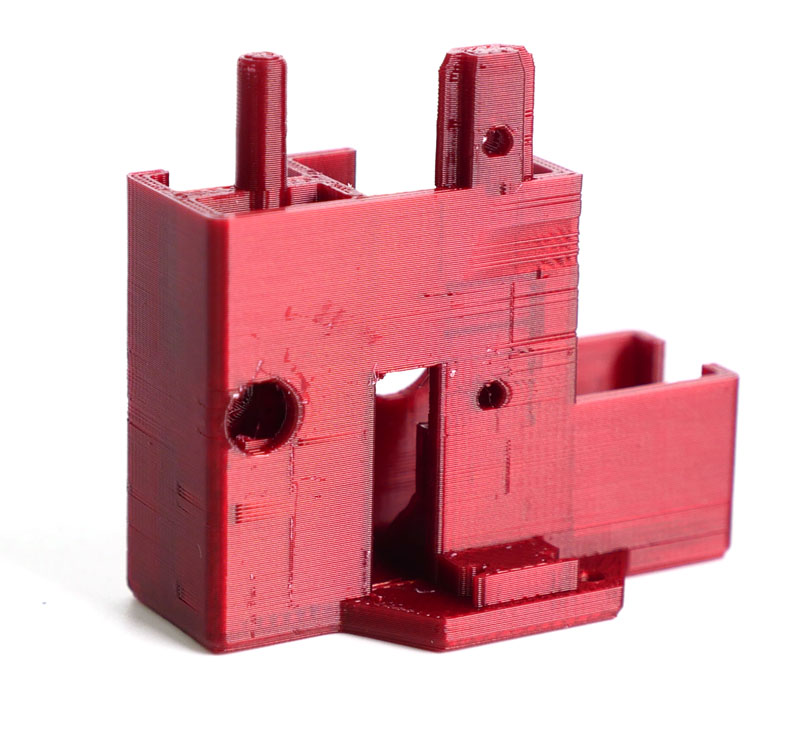
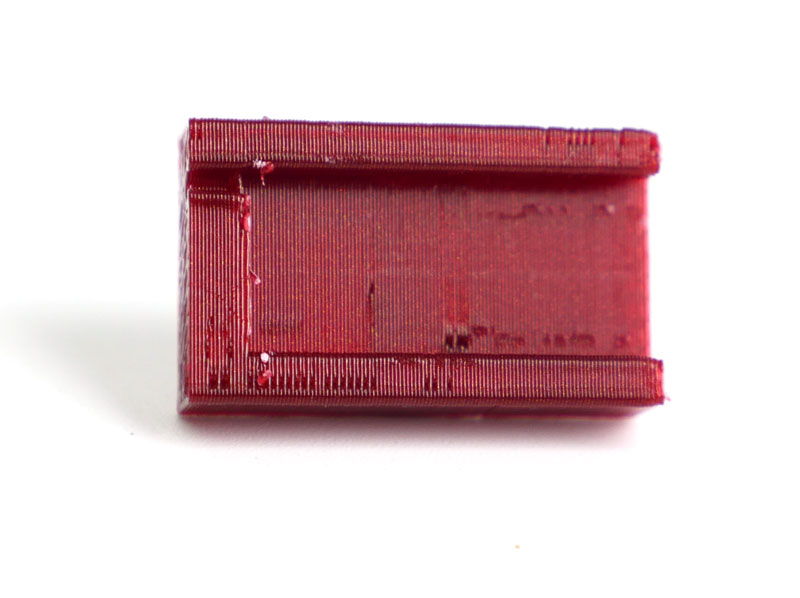
Step 1. Print Plastic Parts Required for Upgrade
Before dissasembling everything, printer out the parts required.
Download the following file for the printable parts:
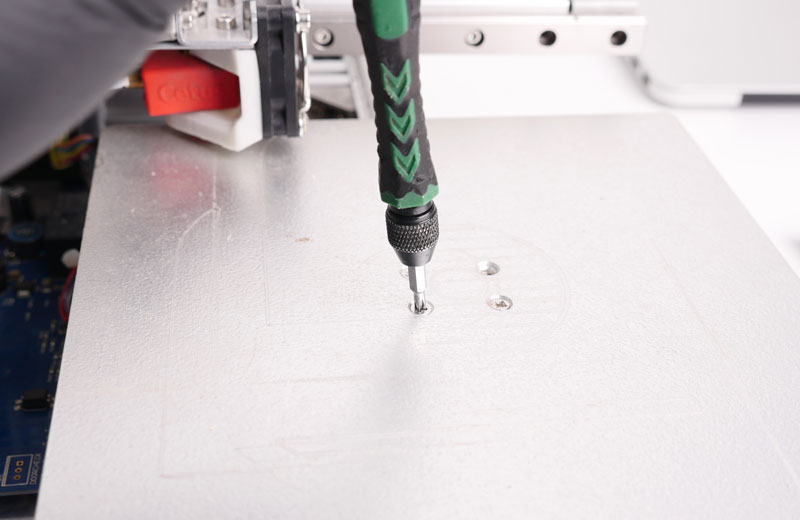
Step 2. Dissamble the Machine.
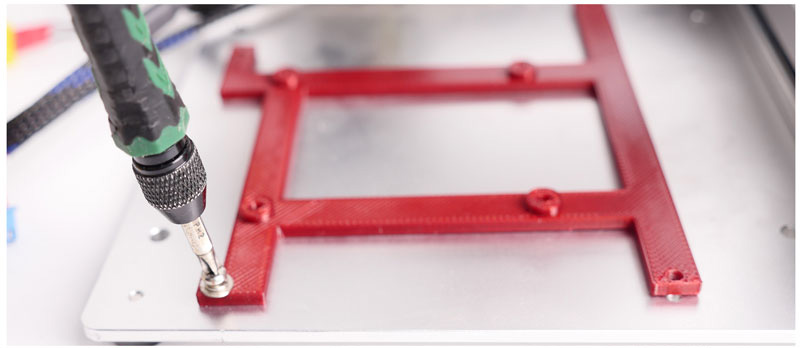
2.1. Remove the platform by removing the 3 scerws.
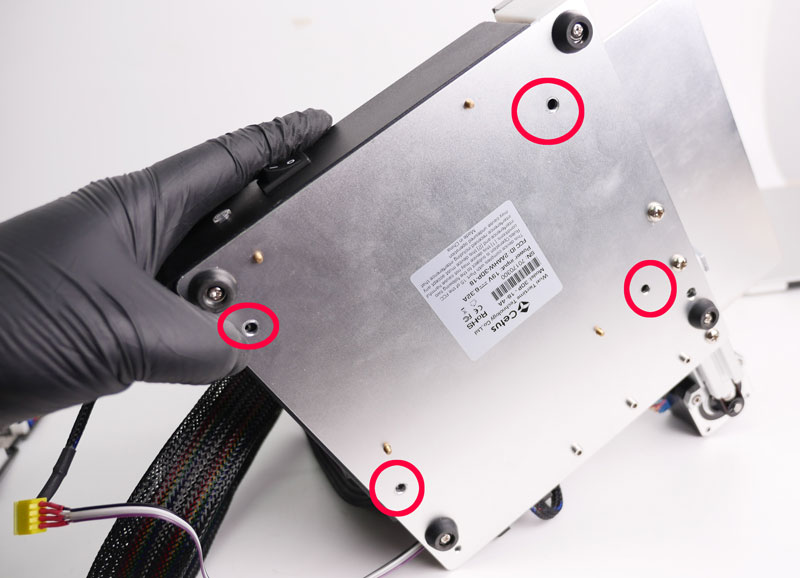
2.2 Remove the 4 screws to the bottom of machine.
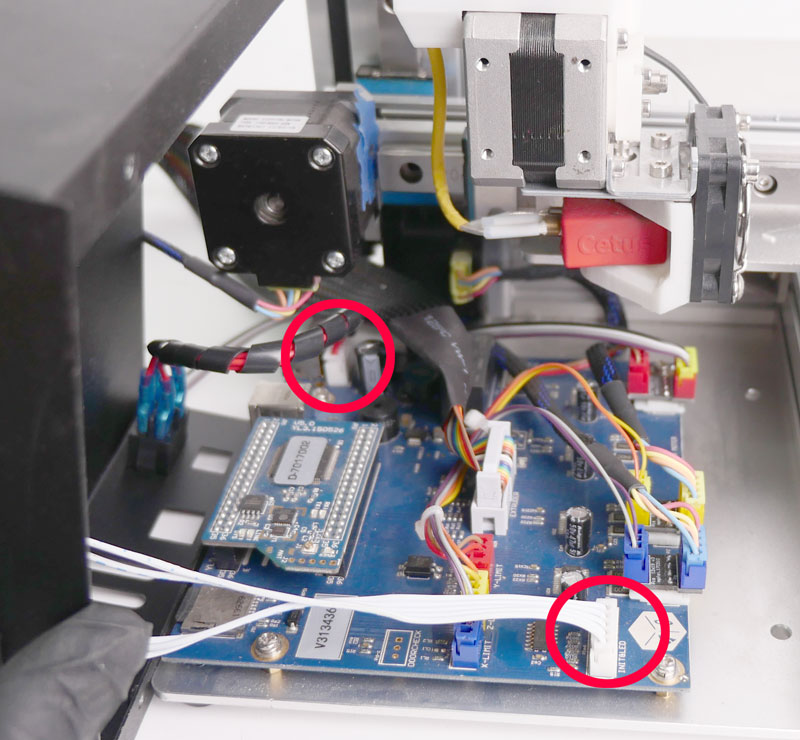
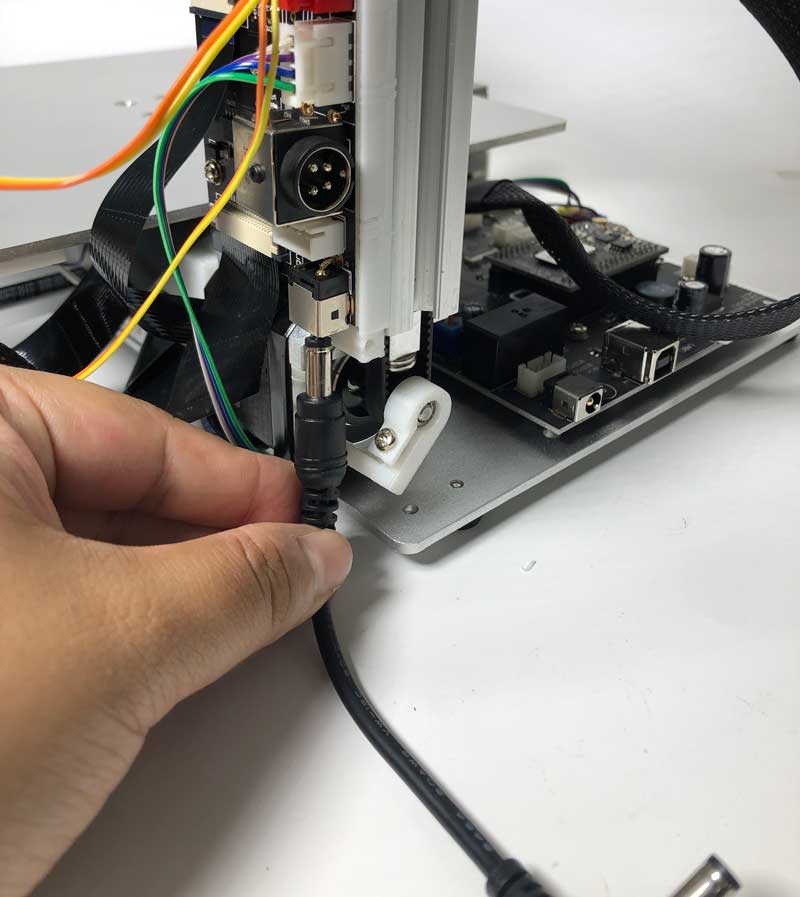
2.3. Remove the power cable and the initialization button cable.
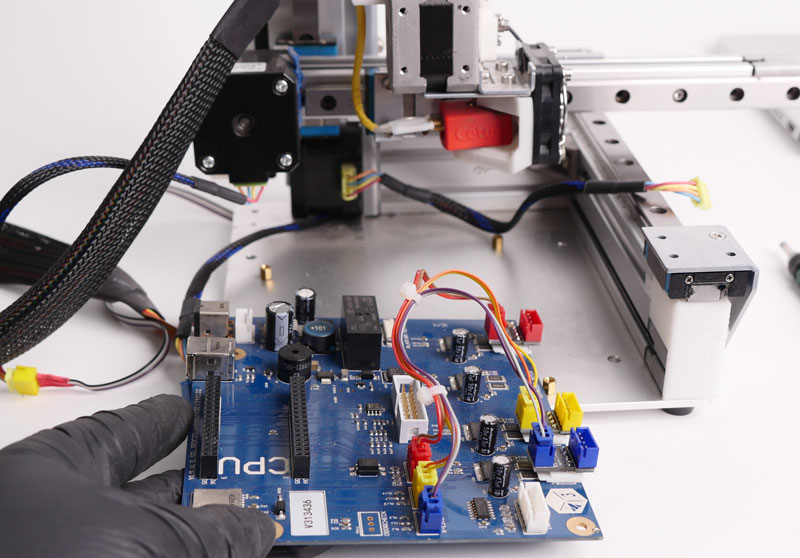
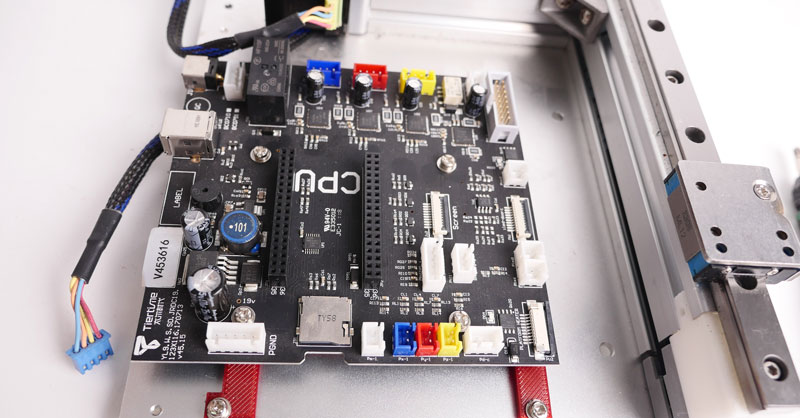
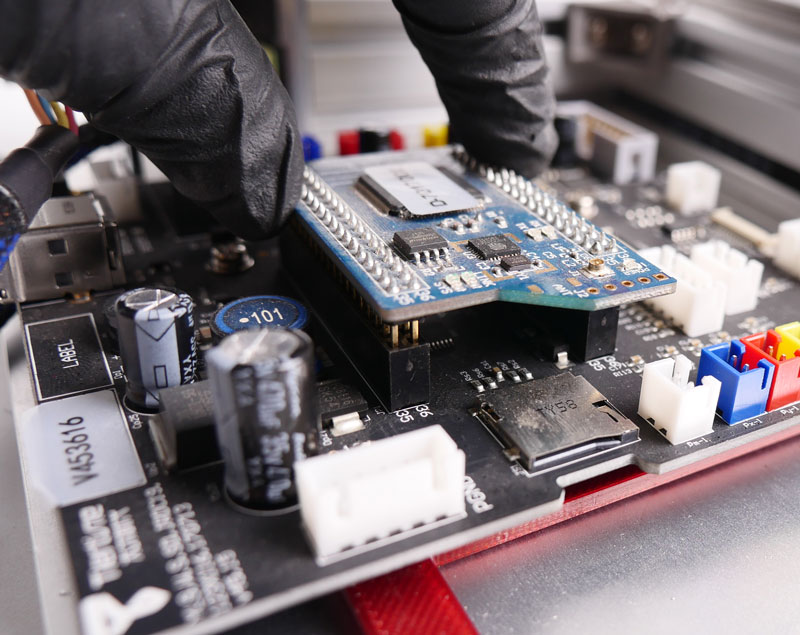
2.4. Remove CPU. Before remove the CPU, discharging yourself is recommended, also be careful not to bend the pin of the CPU board.
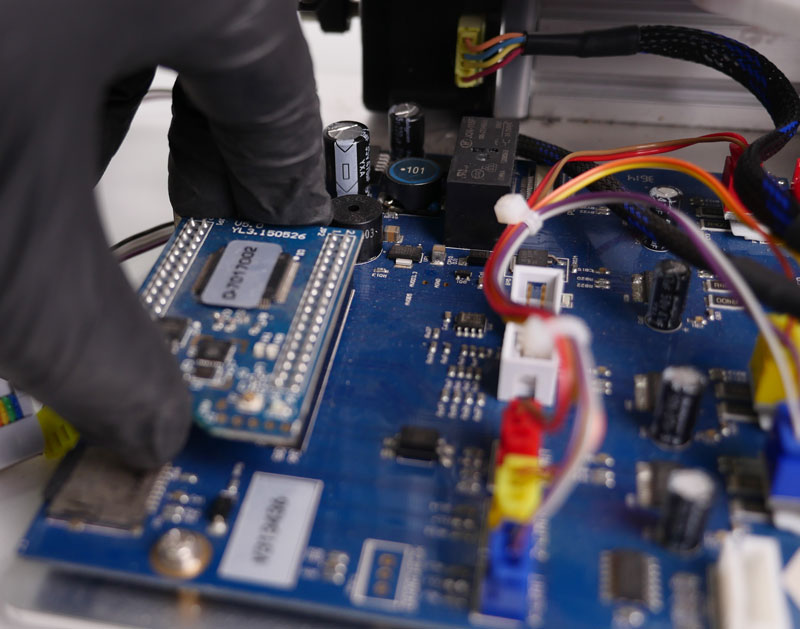
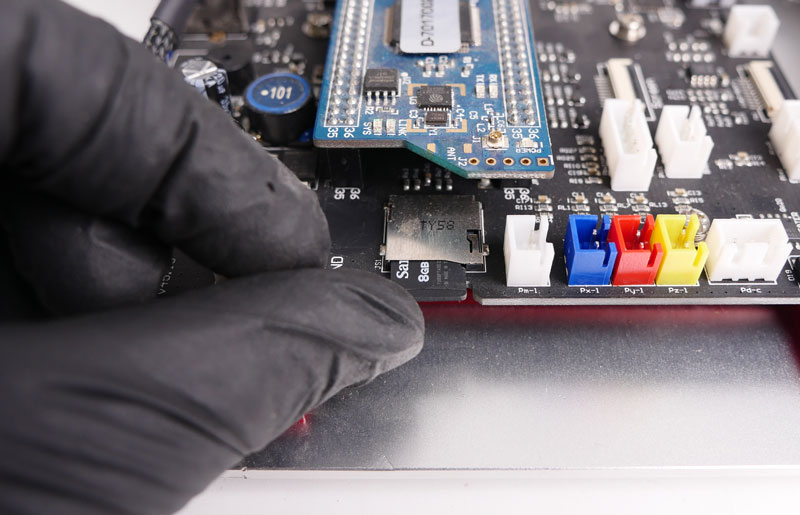
2.5. Remove the SD card on mainboard.

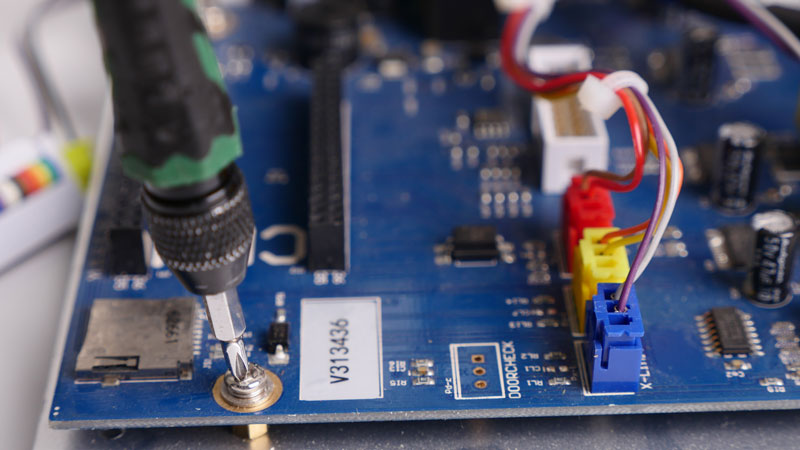
2.6. Remove the 4 screws on mainboard, unplug the extruder cable, motor cables and remove the mainboard.
Step 3. Install MK3 Mainboard.
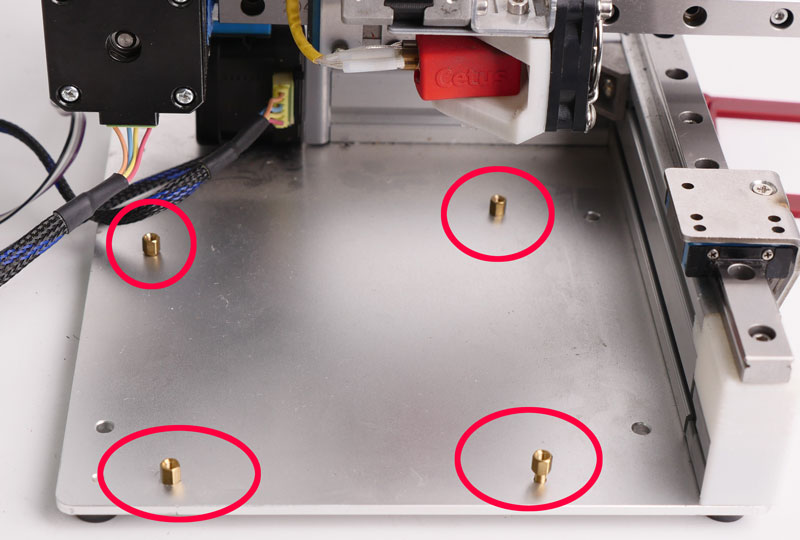
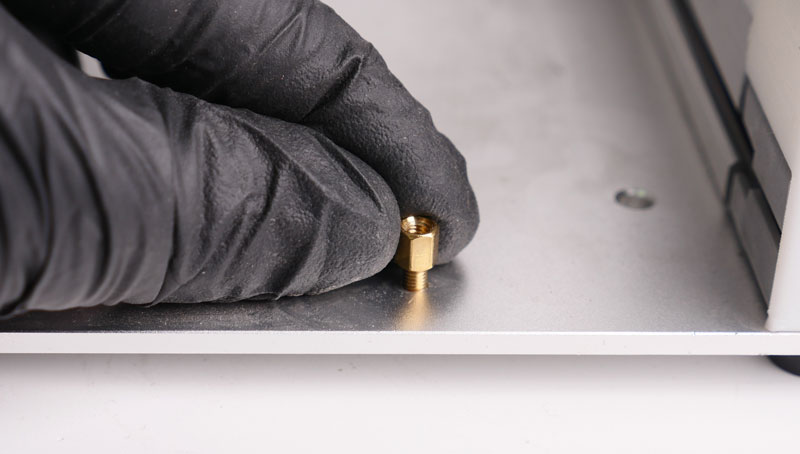
3.1 Remove brass nuts by hand
3.2 Install the Mainboard Adaptor and MK3 Mainboard.
3.3. Install MK3 Mainboard, CPU and SD card.
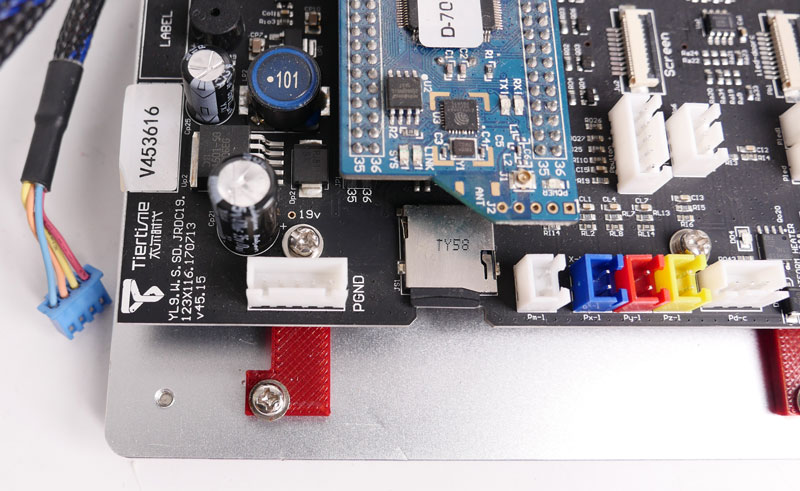
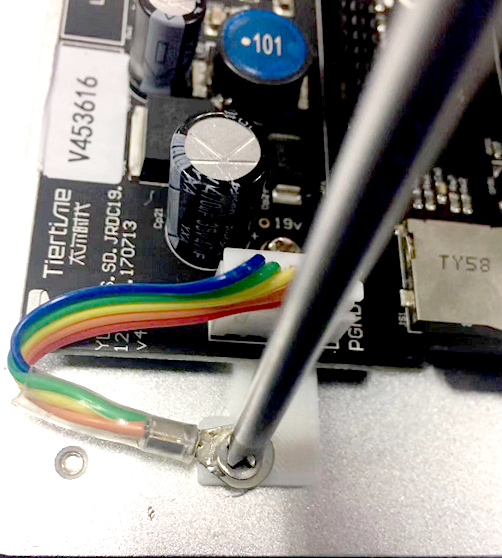
3.4. Connect Ground Cable (reduce risk of static charge damage to electronics)
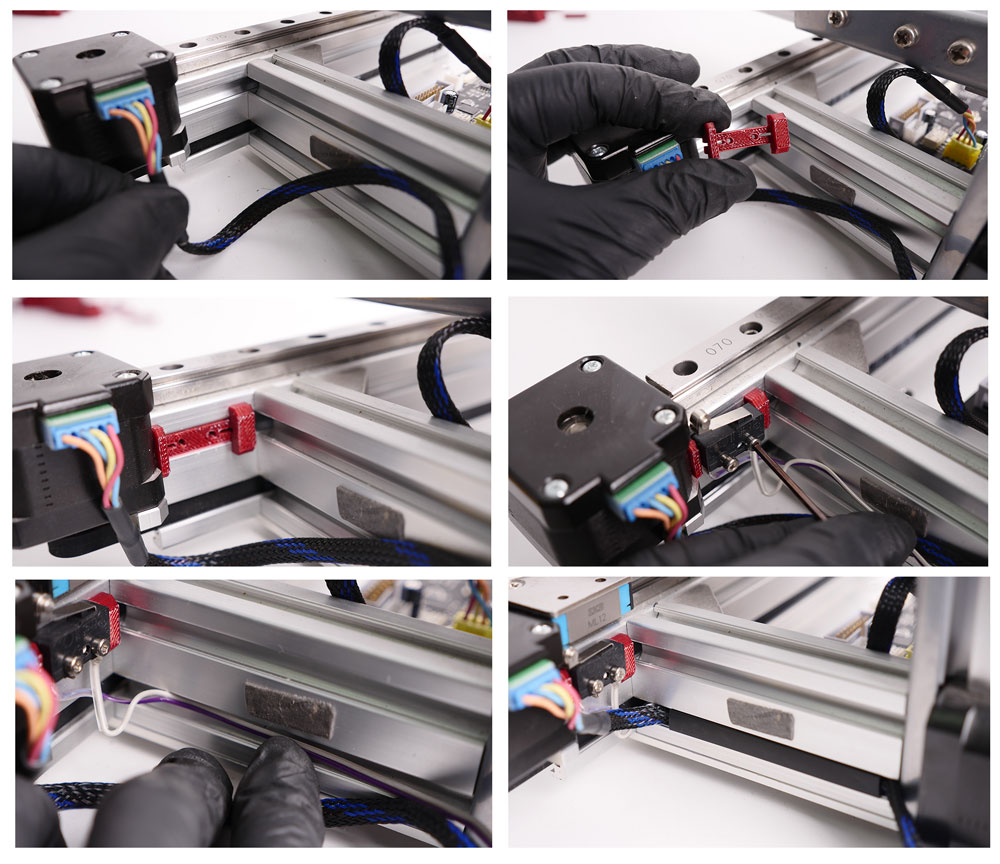
Step 4. Install Y-axis Limit Switch and Trigger.
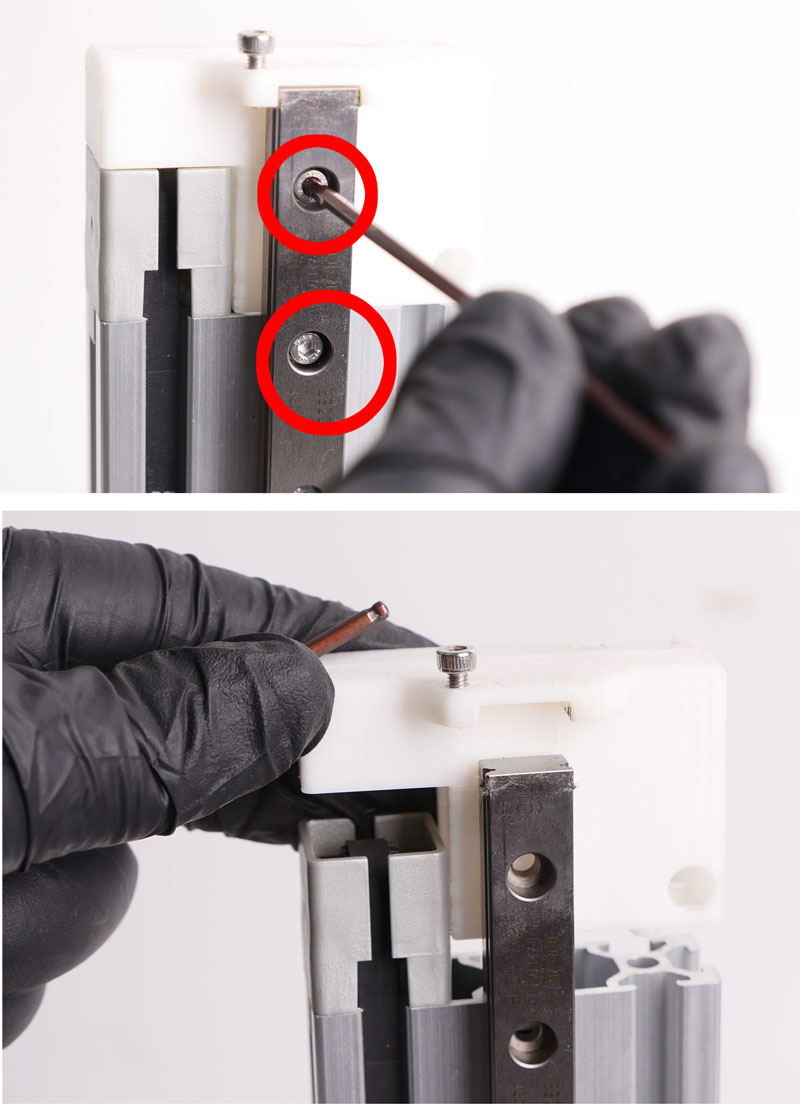
4.1. Remove the Screws
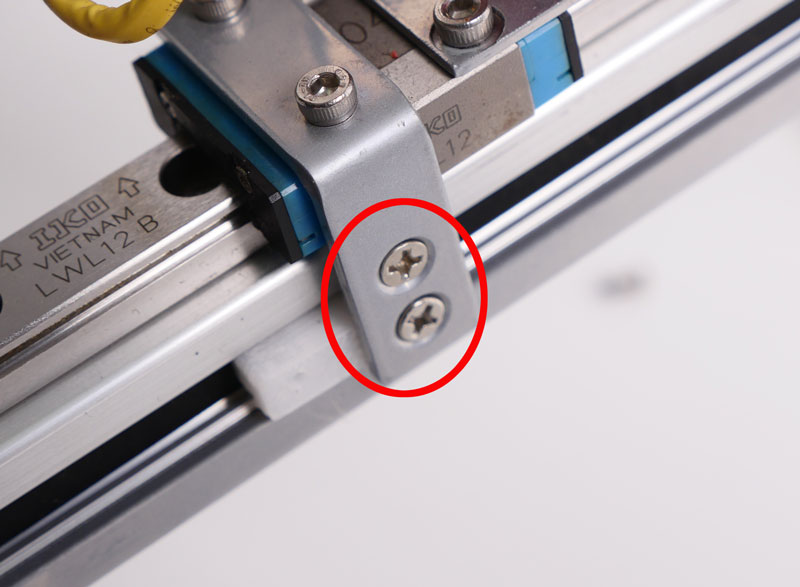
Expose the original Y-trigger
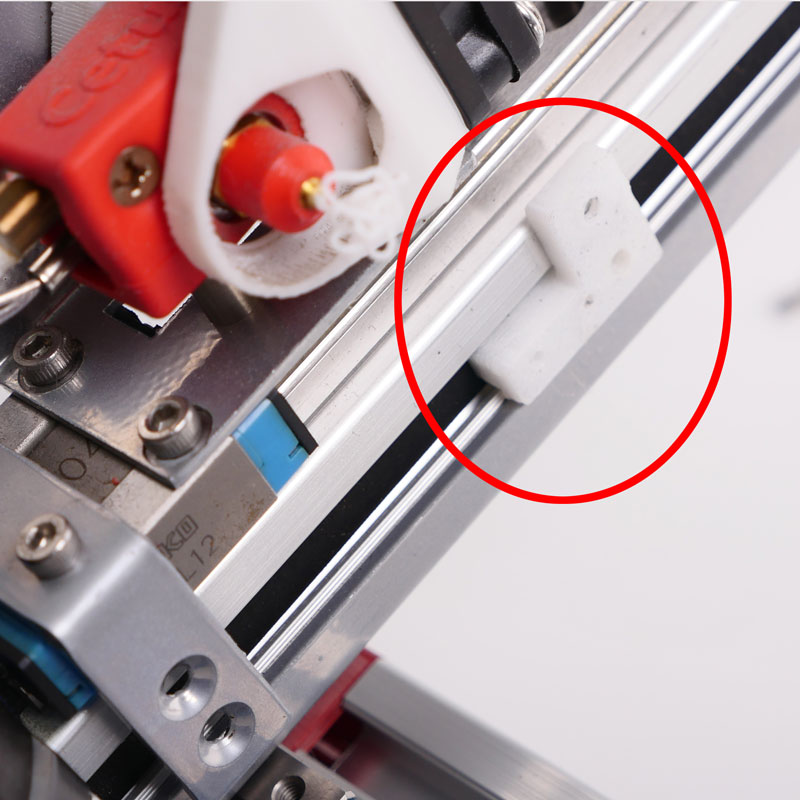
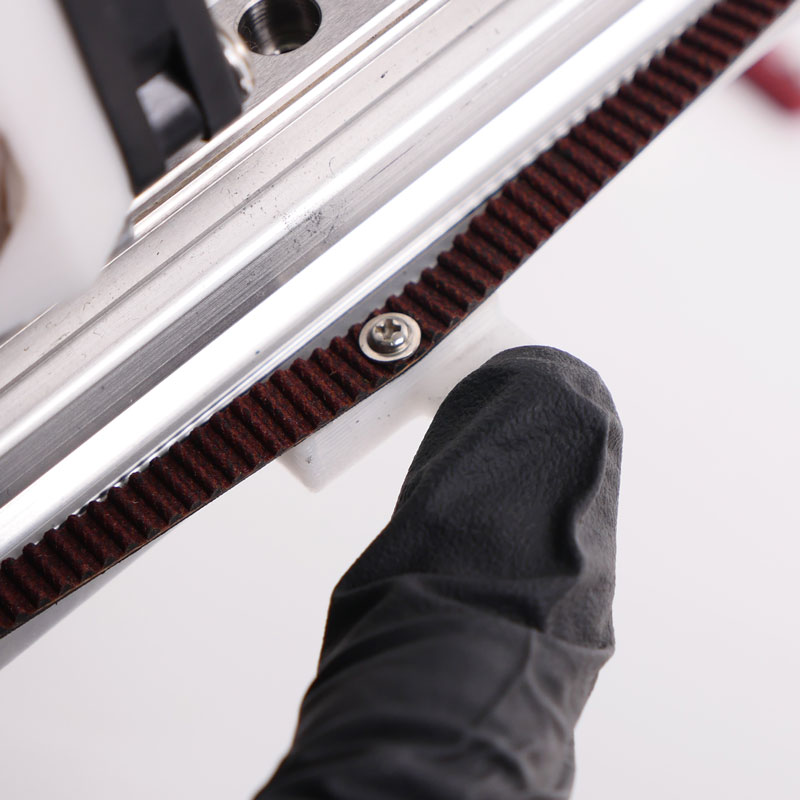
4.2. Lossen the screw on the back of the belt, remove the printed part.Do not remove the screw from the belt, keep it on the belt!
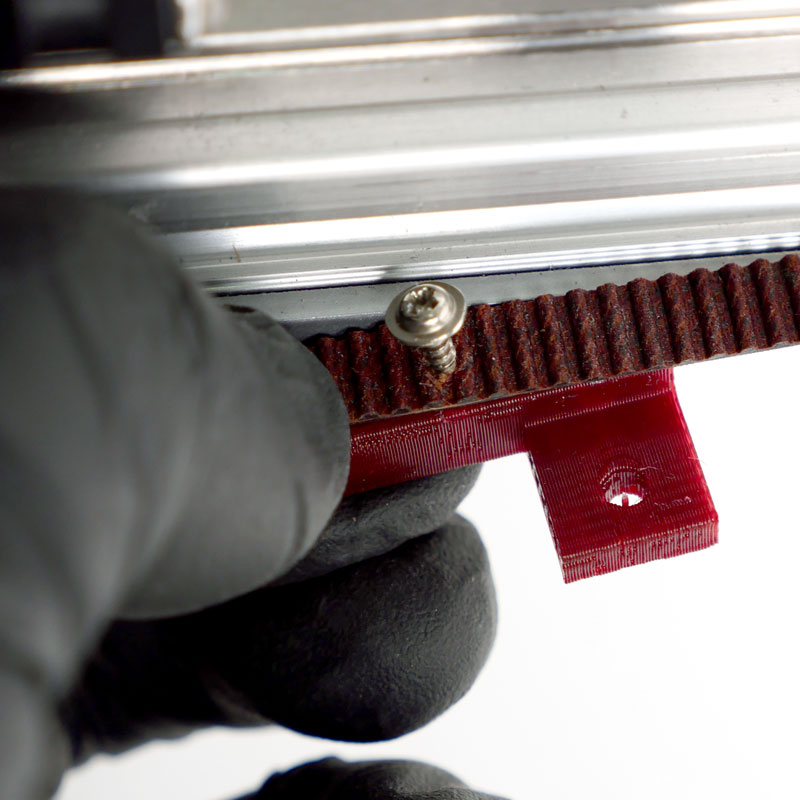
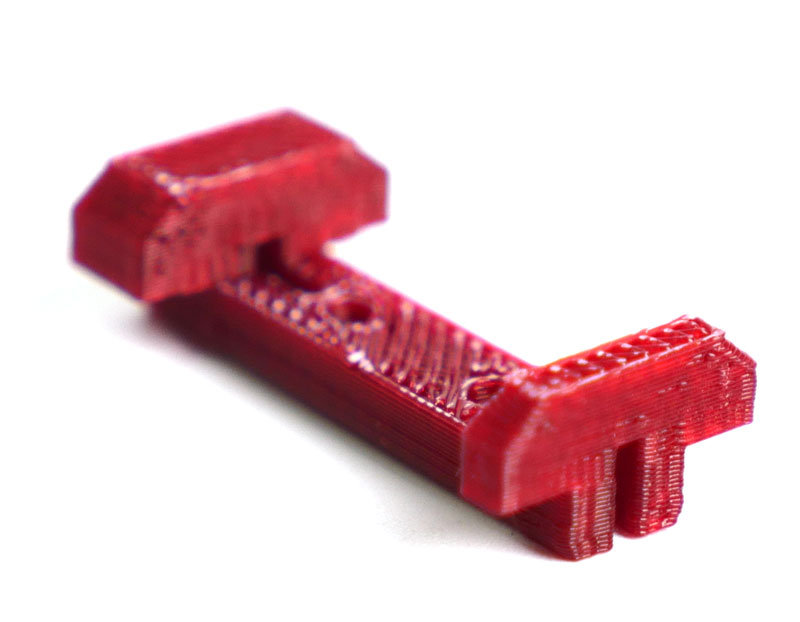
4.3. Install the New Y Limit Switch Trigger
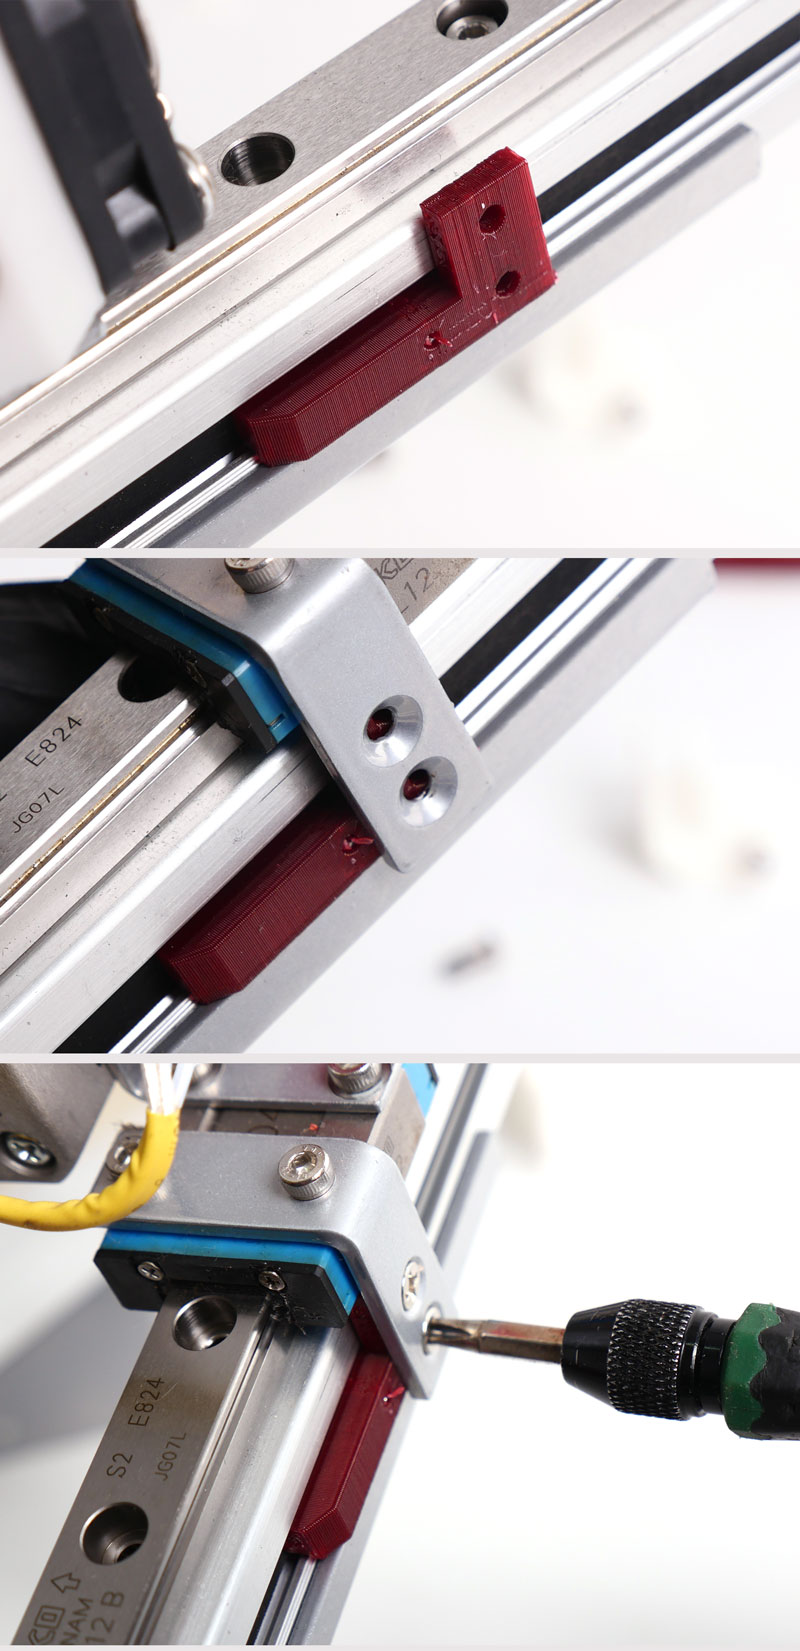
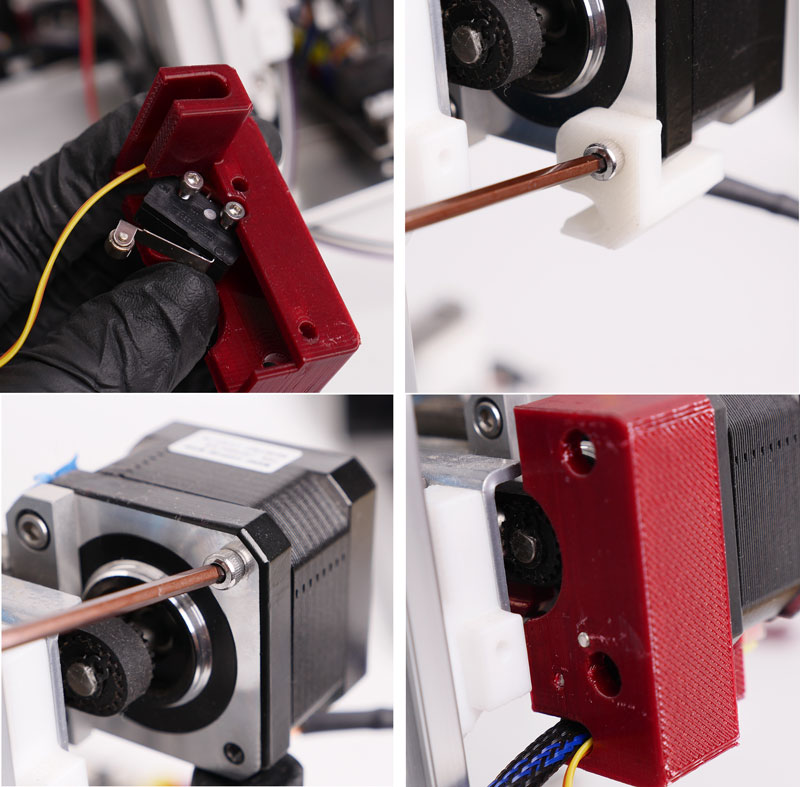
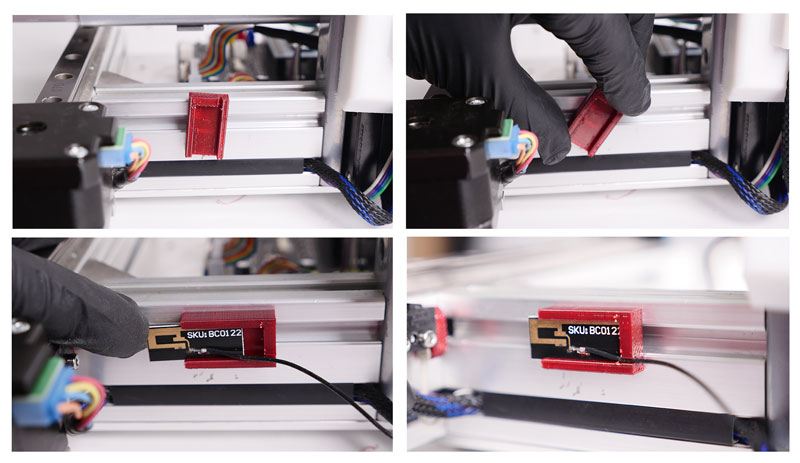
Step 5. Install the Y-axis Limit Switch
5.1. Install the limit switch on the holder.
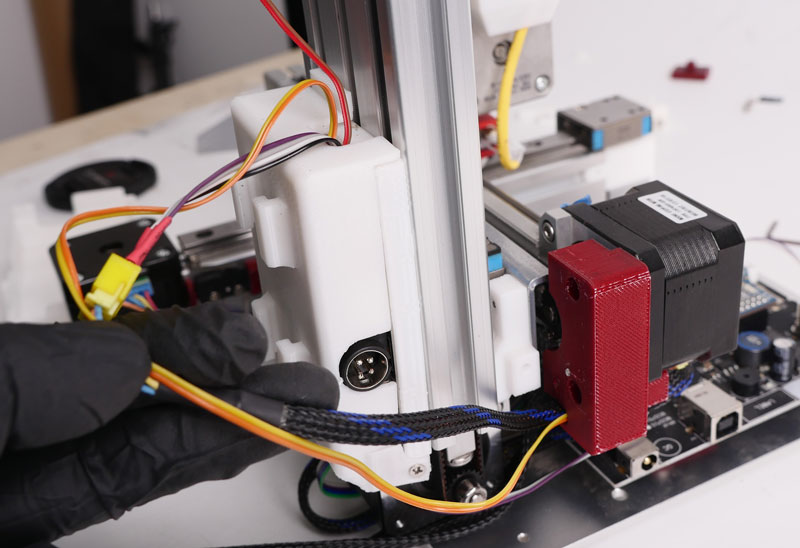
5.2. Remove the original printed part and the screw on the motor.
5.3. Install limit switch holder onto the Y-axis motor.
Step 6. Install the X-axis Limit Switch
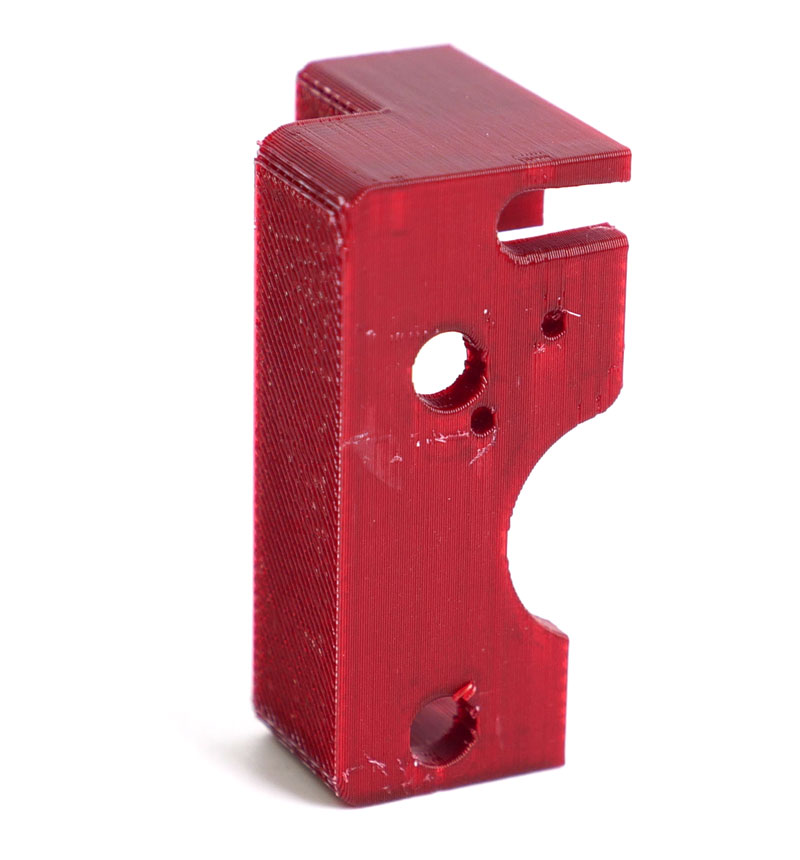
X-axis Limit Switch Holder
6.1 Open the slot cover on the back of the printer.
6.2 Press the holder into the slot, install the limit switch.
6.3 Position the motor cable and limit switch cable into the slot and press fit the slot cover.
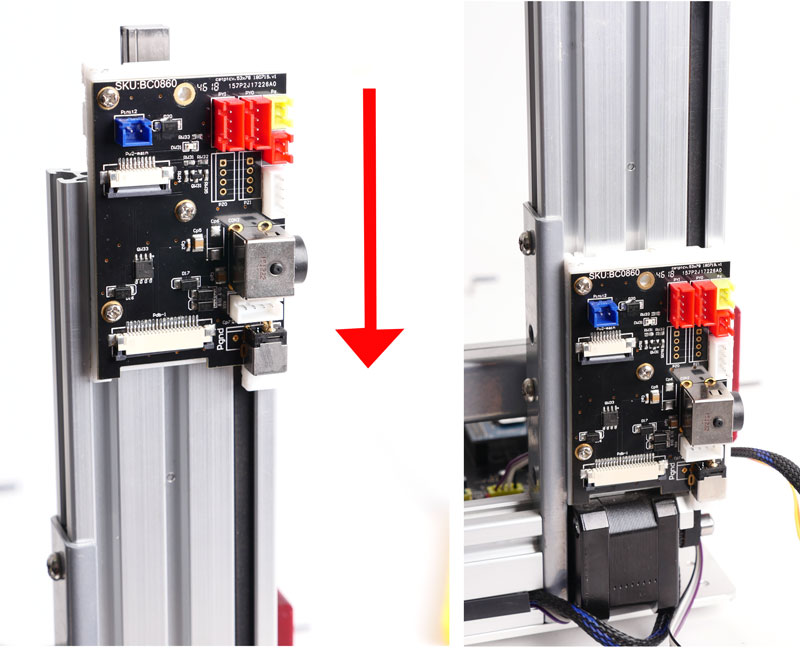
Step 7. Install Extension PCB
May also refer to follwoing articles:
Chapter 4. Installation Guide of Extension PCB for Cetus MK3
Detailed Guidance on Extension Board Installation and Limited Switch Issues
7.1 Uninstall the Z-cap
7.2 Slide the extension board into extrusion slot.
Step 8. Install MK3 Z-axis Cap and Limit Switch.
8.2 Install the Z-axis Limit Switch.

Step 9. Connecting the Cables
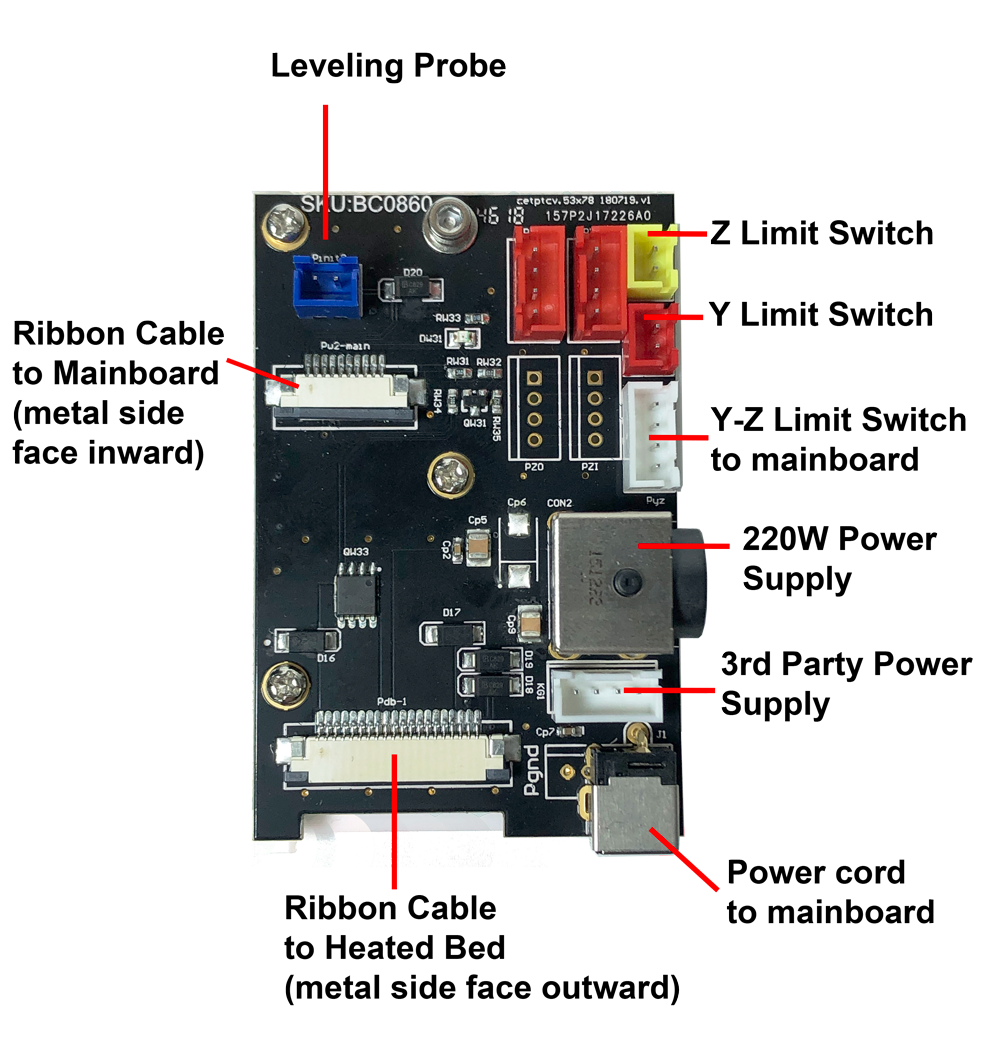
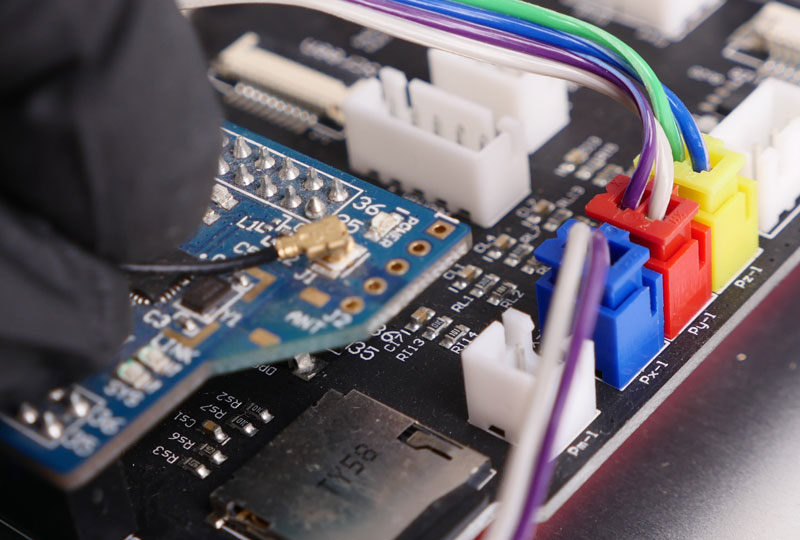
9.1 Connec Z-limit switch and Y-limit switch to the extension board. Follow the color.
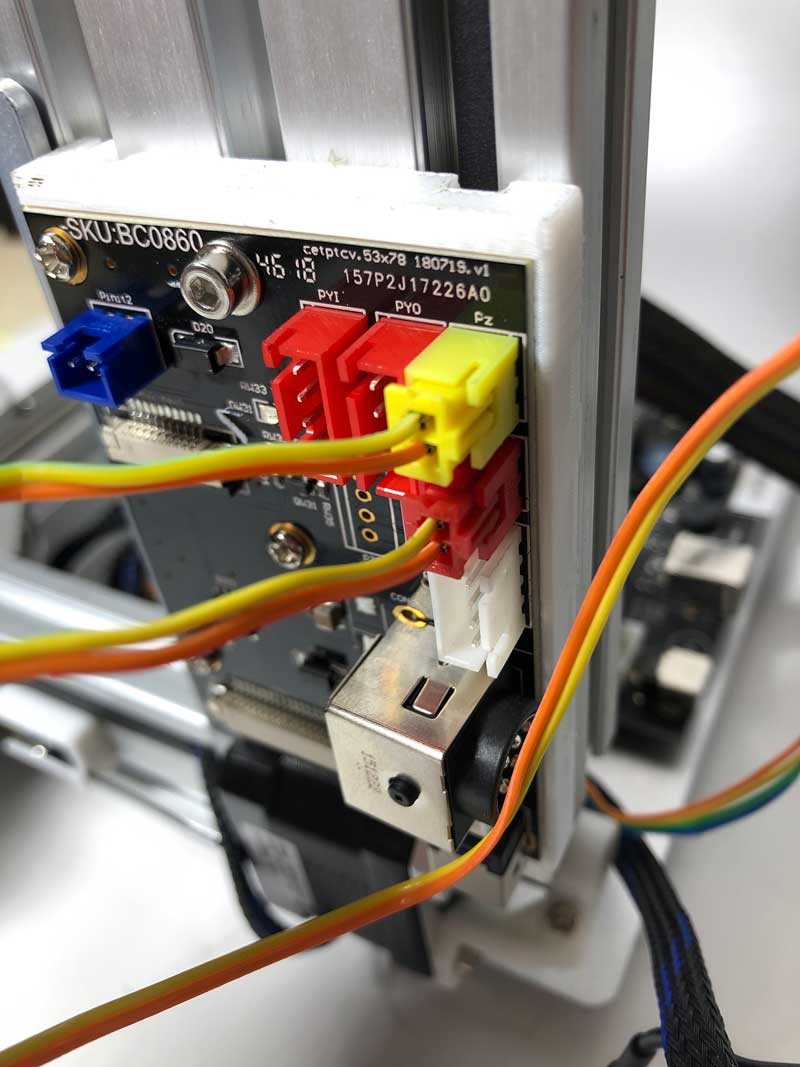
9.2 Connect the limit switches from extension PCB to mainboard, using the included relay cable.
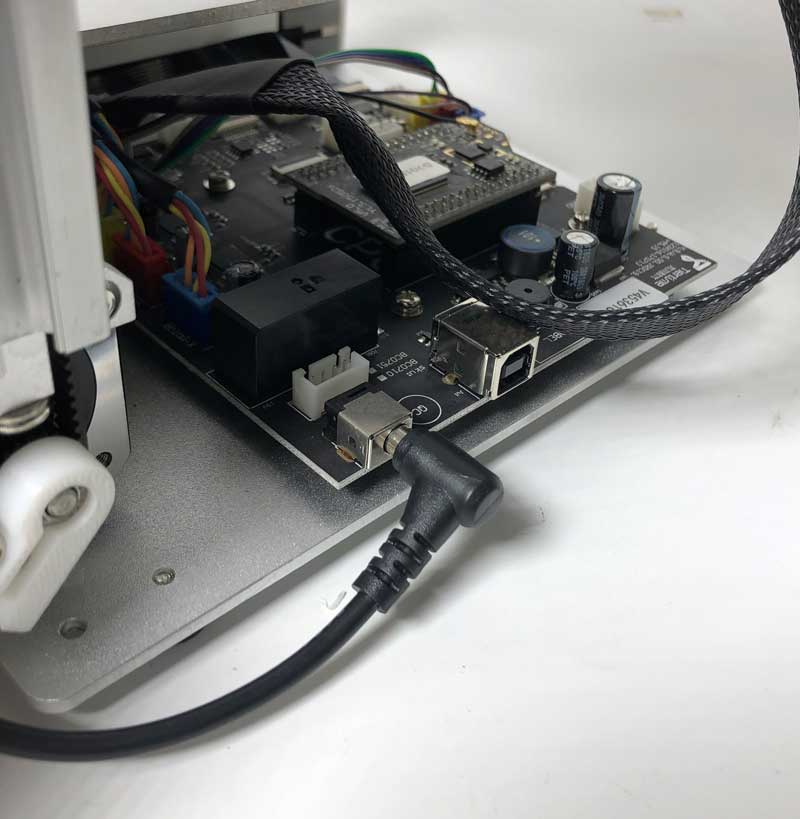
9.3 Connect the power cable from extension PCB to mainboard
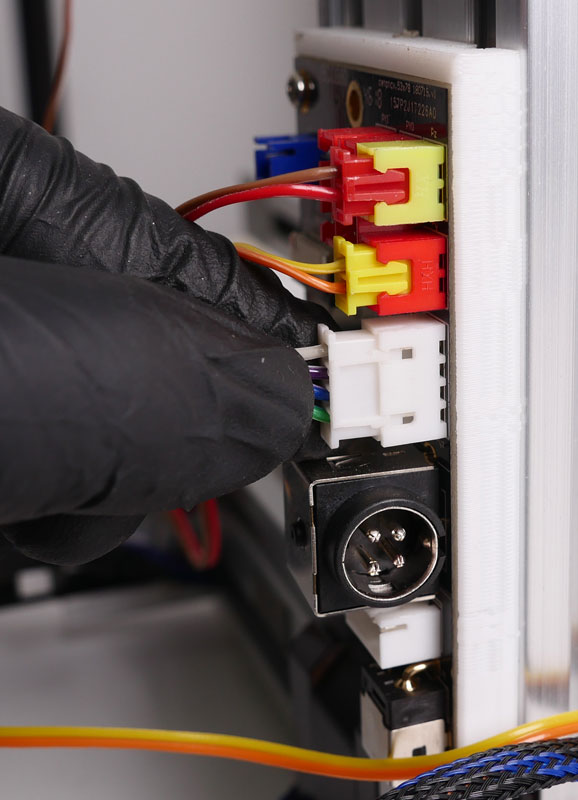
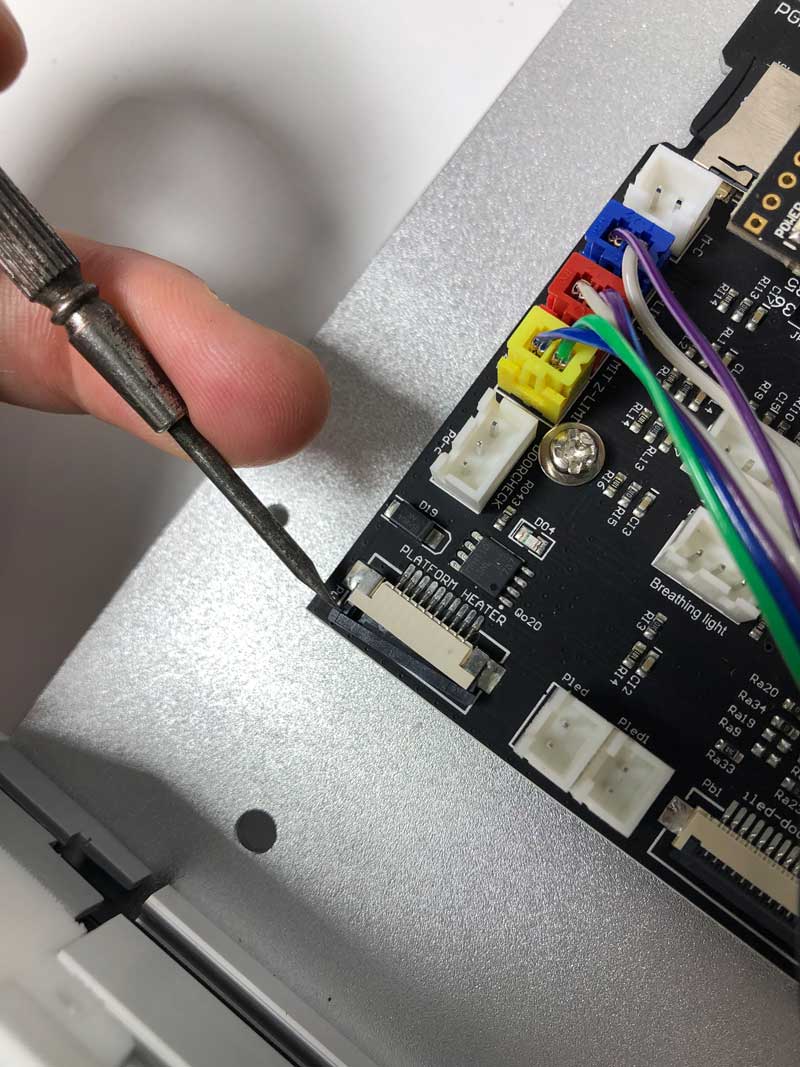
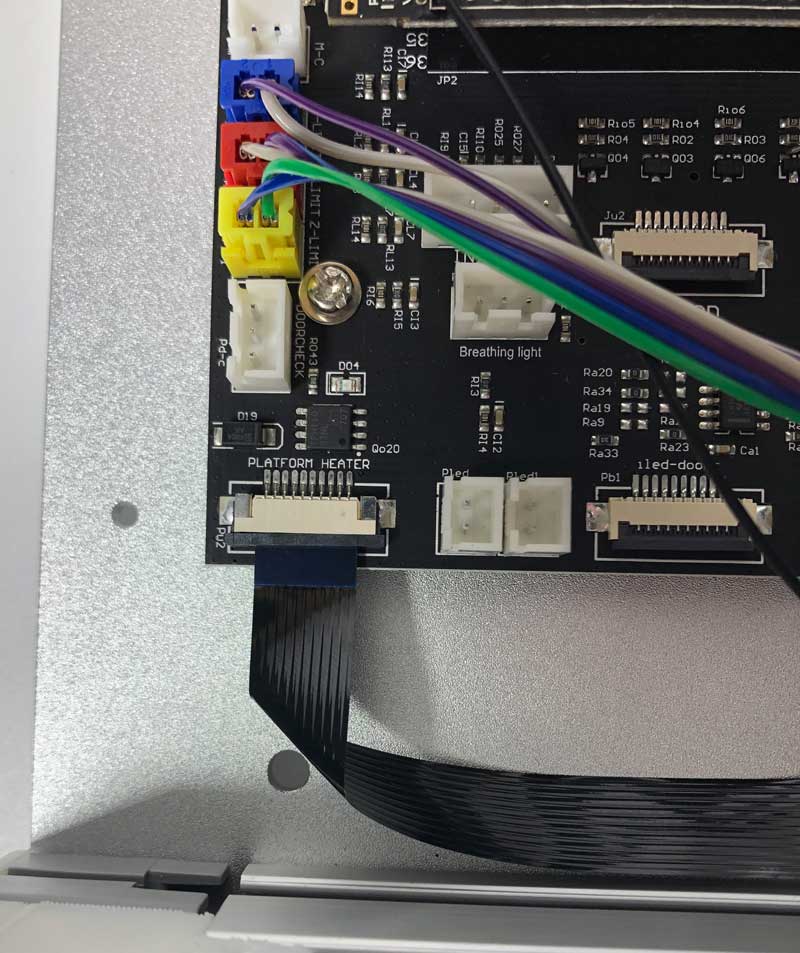
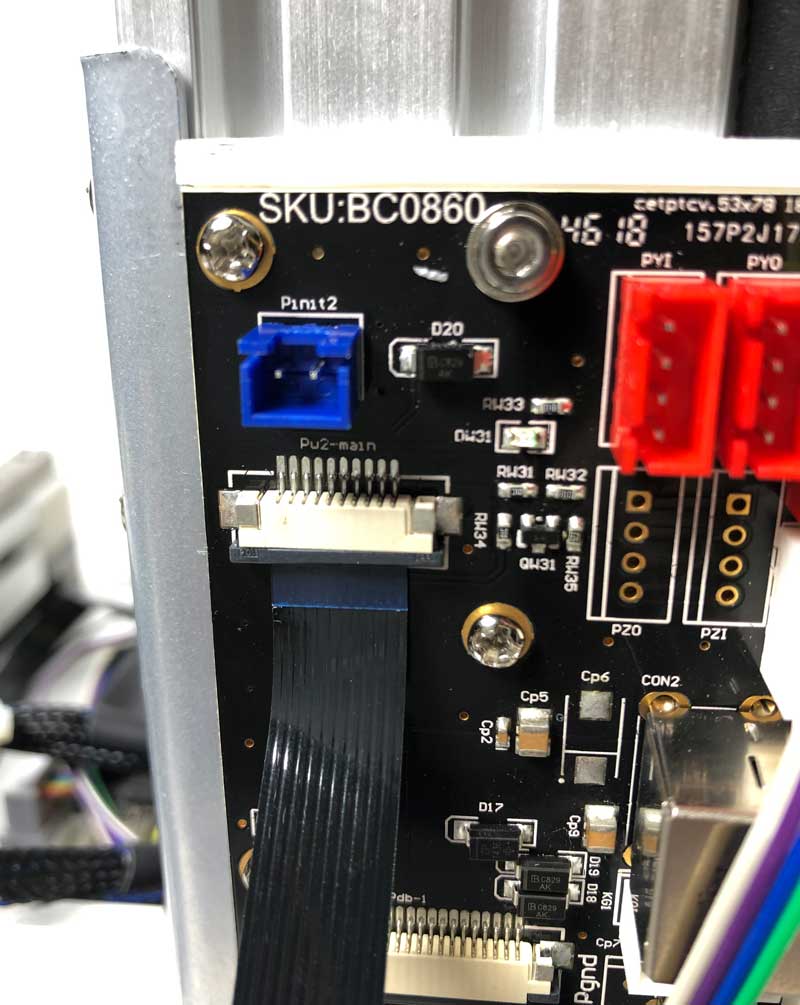
9.4 Loosen the connector (labelled as " Platform Heater) for ribbon cable. Insert the cable into the connector, metal pins facing to mainboard.
9.5电缆折叠成形状像the red line indicated below.
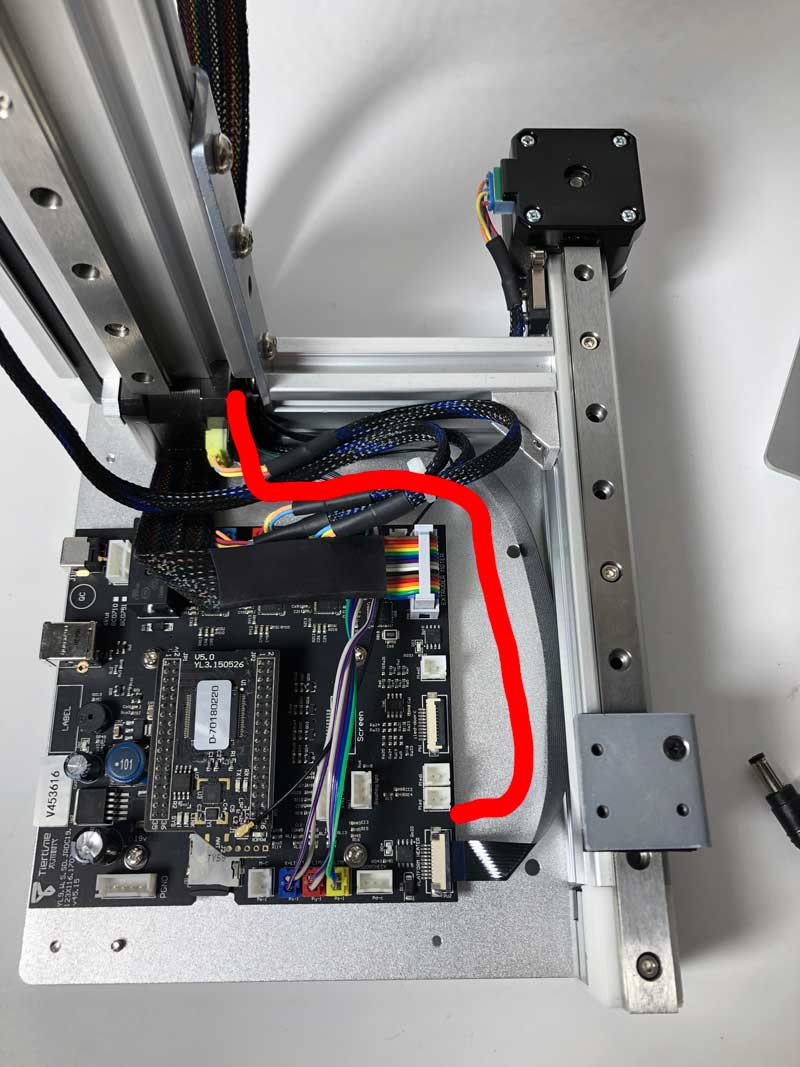
9.6通过空间元素插入带状电缆een motor and Z-axis bracket.

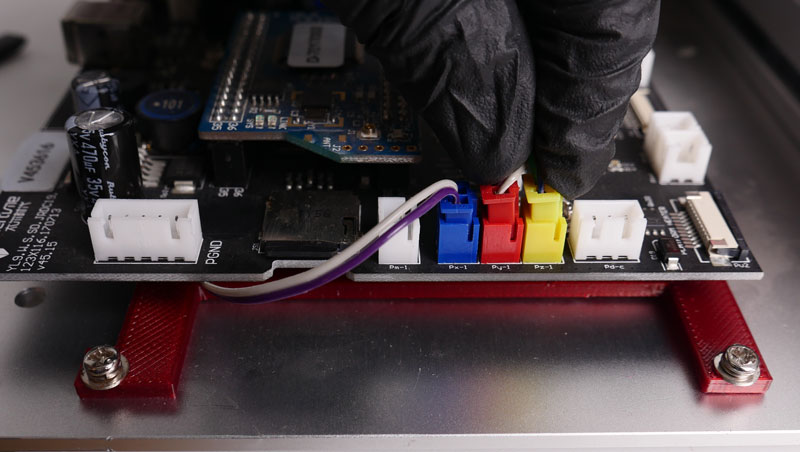
9.7 Fold the cable upward and insert into the connector, metal pins facing toward extension board.
This ribbon cable is important for temprature control of heated bed upgrade and autoleveling.
Step 10. Install Wifi antenna
10.1 Insert the antenna holder into the slot of the back of machine, turn it 90 degrees to lock it in position.
10.2 Insert the antenna into the holder and connect the other end to CPU.
10.3 Make sure the cables are well sorted, no tangling. Install the PCB cover.
10.4. Lock the PCB cover.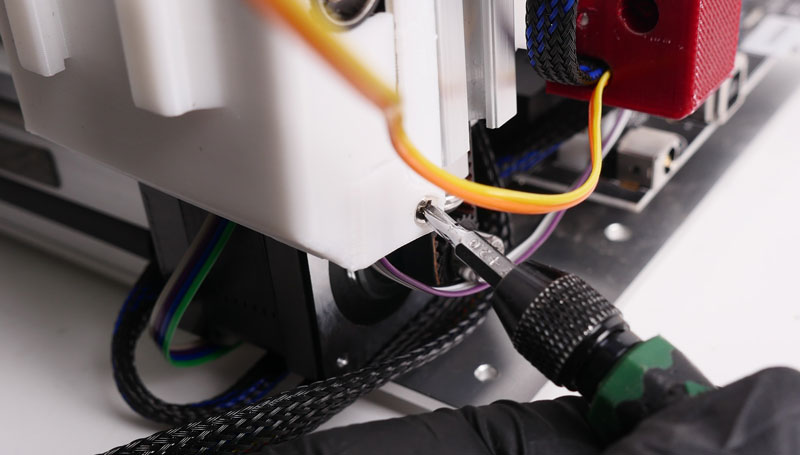
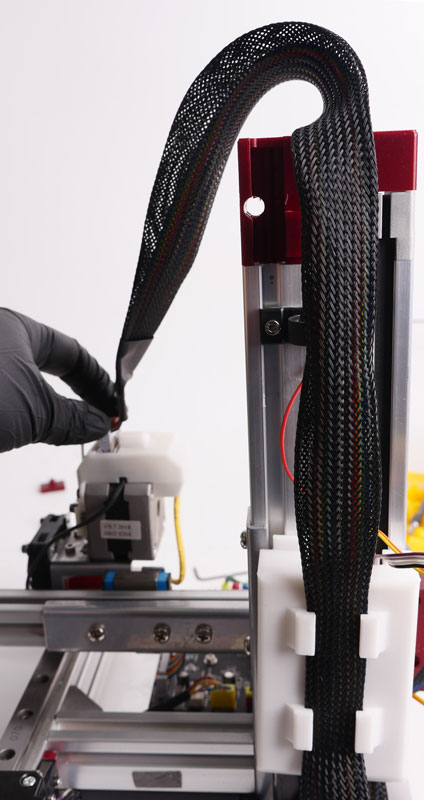
10.5. Lock the extruder cable along the Z-axis
Step11. ROM Update:
CPU rom must be updated before the machine is usable, please refer to following info to update your rom.
| MK3 Standard Version ROM: | Cetus S7NTC_R_180524 MK3-STD.ROM |
| MK3 Extended Version ROM: |
Step 12. Instruction for Installing Heated Build Platform
Step 13. Instruction for Installing True Touch Calibration Probe
Comments
9 comments
Can the mk1 use this kit too?
I've had problems installing the upgrade:items 5 & 7 in the kit differ from the spec above; the ground wire is different (no 5 way plug to attach to PCB), and the USB/power sockets won't align to the holes in the case if the brass standoffs are mounted on the mainboard adapter as shown above - it looks like the board either needs to mount directly to the adapter, or the standoffs need to be moved to new drilled&tapped holes in the base plate, and the adaptor discarded. I'll submit a support request - not sure if these comments are monitored.
Will Tiertime issue signed drivers for Windows?
I have completed the hardware upgrade, but now can't upgrade the ROM, as Windows does not have the correct drivers. I tried downloading the drivers from the website, but these are still not signed and so will not install.
Turning off the Widows security features to force the installation is not a desirable solution.
Hi the kit has different bugs:
1. the 3d printed parts are not ok
https://support.tiertime.com/hc/article_attachments/360042023454/upgrade_parts.up3
for the z axis I had to use the original cap to make a hole for the endstop because the linear rail from my printer seems to be shorter (the black part is the new one from the link above (didn't fit).
when the Mainboard was installed it was too close to the baseplate edge so that I could not put the Cover back on again. Therefore I hab to drill 4 more holes in the Baseplate to shift the Mainboard about 5mm to the middle.
after installing all the hardware I flashed the CPU with
https://support.tiertime.com/hc/en-us/article_attachments/360042033694/Cetus_S11NTC_R_180524_MK3-EXT.ROM
seems to work...but.... the hardware Init switch did not work anymore !!!!!!
Init via software is working and the endstops are working too.
But thats not all !!!
when I wantetd to print the first time (alfter leveling of course) the Nozzle first cleans (one straight line) which was ok. But when starting the first raft-layer-line the nozzles seems to dig into the printbed.
y and z axis move simultaniously.
https://youtu.be/xE2j11haqVQ
So I dont know whats wrong and I need support
I have the same problem with the base cover. Is this the only solution? Printing is fine though.
It works for me:mainboard adaptor plate (remix)
And: I mounted the board directly on the adapter.
It seems that they forgot to remove the v-groove edge rails from the PCB. After removing them carefully with pliers the PCB fits perfectly in the case with the original adaptor.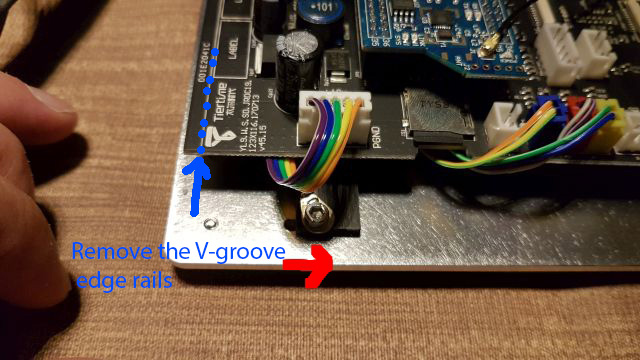
i cant get anything to work after Rom flashing attempt. It only took 1 second so I don't think it flashed the new firmware. Anybody?
I have the Problem, that after flashing the rom, connecting the momentary switches and doing evrything above (plus the adjustments in the coments), the printer just ignores them and jamms right in the z-Axis stopper. In the Up studio software there is an system error, after reinstalling the rom using the utility software that error was gone. Problem is still there. please Help
Pleasesign into leave a comment.